Add section to header new Acumatica UI
Acumatica’s Modern UI, built on the Aurelia and TypeScript framework within the XRP Platform, introduces a flexible and modular way to customize screens using declarative markup with <template>, <qp-template>, <qp-fieldset>, and <field> tags.The Modern UI follows the Model–View–ViewModel (MVVM) pattern, where views are represented by HTML templates, view models by TypeScript code, and models by server-side graphs that handle data exchange.In this article, we’ll walk through how to add a new section to the header of a screen using the new Acumatica Modern UI.We’ll demonstrate how to add a custom section with additional fields to the header of an existing screen—such as a Sales Order or Purchase Order—by modifying the screen layout with QP templates and inserting the section into a new slot.
1. Remove Existing Fieldsets:
To simplify the layout or start from a clean structure, you can remove default fieldsets:
<qp-fieldset remove="#fsColumnC-Order"></qp-fieldset>
<qp-fieldset remove="#fsColumnB-Order"></qp-fieldset>
2. Modify the Header Layout
Use a <qp-template> to modify the existing form layout (#form-Order) and define a new structure with custom fieldsets.
<qp-template modify="#form-Order" name="7-17">
<qp-template id="tmpColumnB-Order" slot="B" name="10-7-7">
3. Rebuild Default Columns
You can reintroduce default sections if needed, grouped by logical slots.
4. Add a New Custom Section to Header
Finally, add your custom section in slot C of the form. This section can hold user-defined fields or any other custom UI elements.
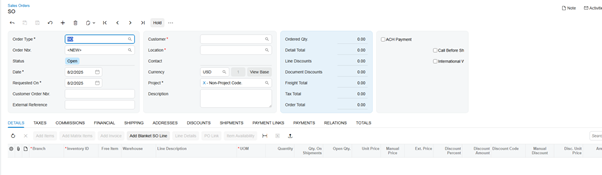
Result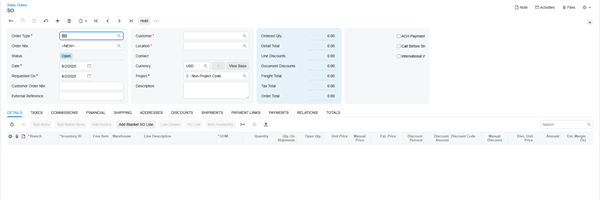
As we can see not our section displayed but fields displayed in a strange way
That’s because to each section Acumatica new UI adds label-container css class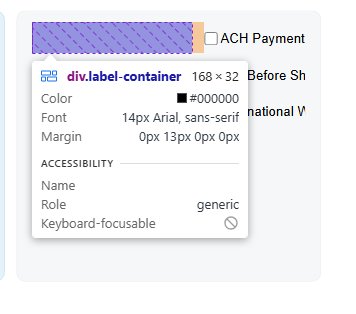
To change that you should use next approaches
class="no-label"
The no-label CSS class specifies that the element and all its nested elements do not have labels
Or to each field that you want remove that class with label
<field no-label="true" name="UsrACH"></field>