Widgets in Acumatica
One of the key features of Acumatica is its ability to customize the user interface using widgets. Widgets provide a convenient way to display and interact with data, allowing users to access important information and perform tasks efficiently.
I will show you how to create your own Dashboard and create some widgets.
Let's start creating our Dashboard: open Dashboard form (SM208600) by searching or click Customization à Dashboards (Profiles category). Click Add new record and type name for the dashboard in Name box. Select in Owner Role box à Administrator.
There are 3 checkboxes:
1 Allow Users to Personalize to allow other users copy and modify dashboard
2 Make Visible on the UI to add dashboard to any workspace
3 Expose to the Mobile Application to display dashboard on mobile application
From my side, I choose 1 and 2.

On a Visible To tab by default, Access rights is set to Not Set, so all roles have access to this dashboard. You can change these rights simply by finding the role you need to give access and selecting Access right to Granted. Click Save and go to your dashboard at the path you specified
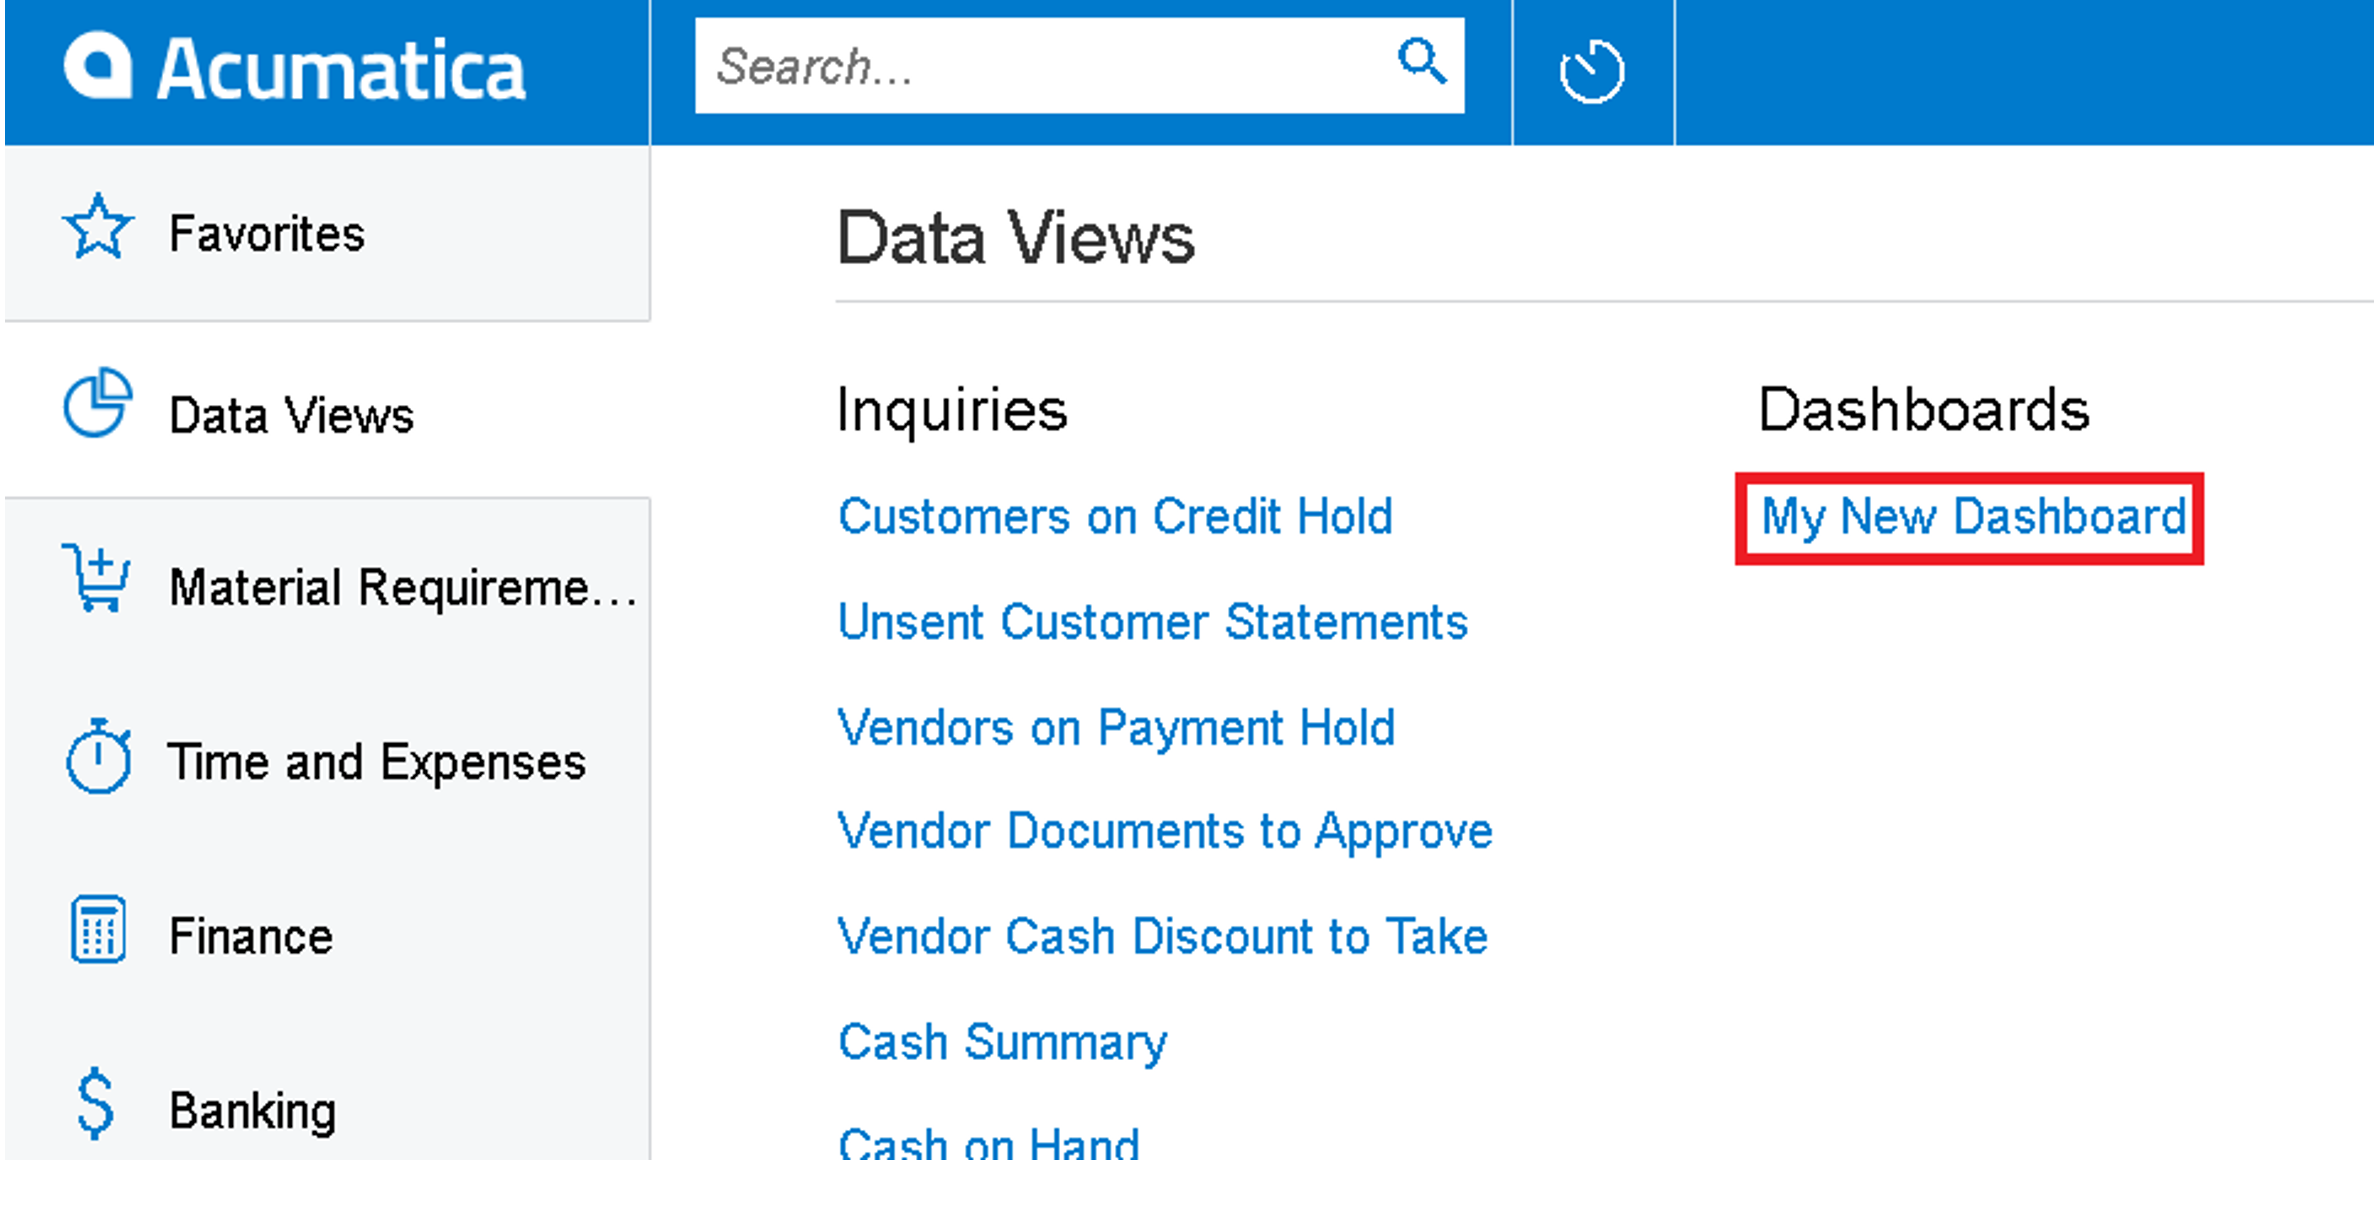
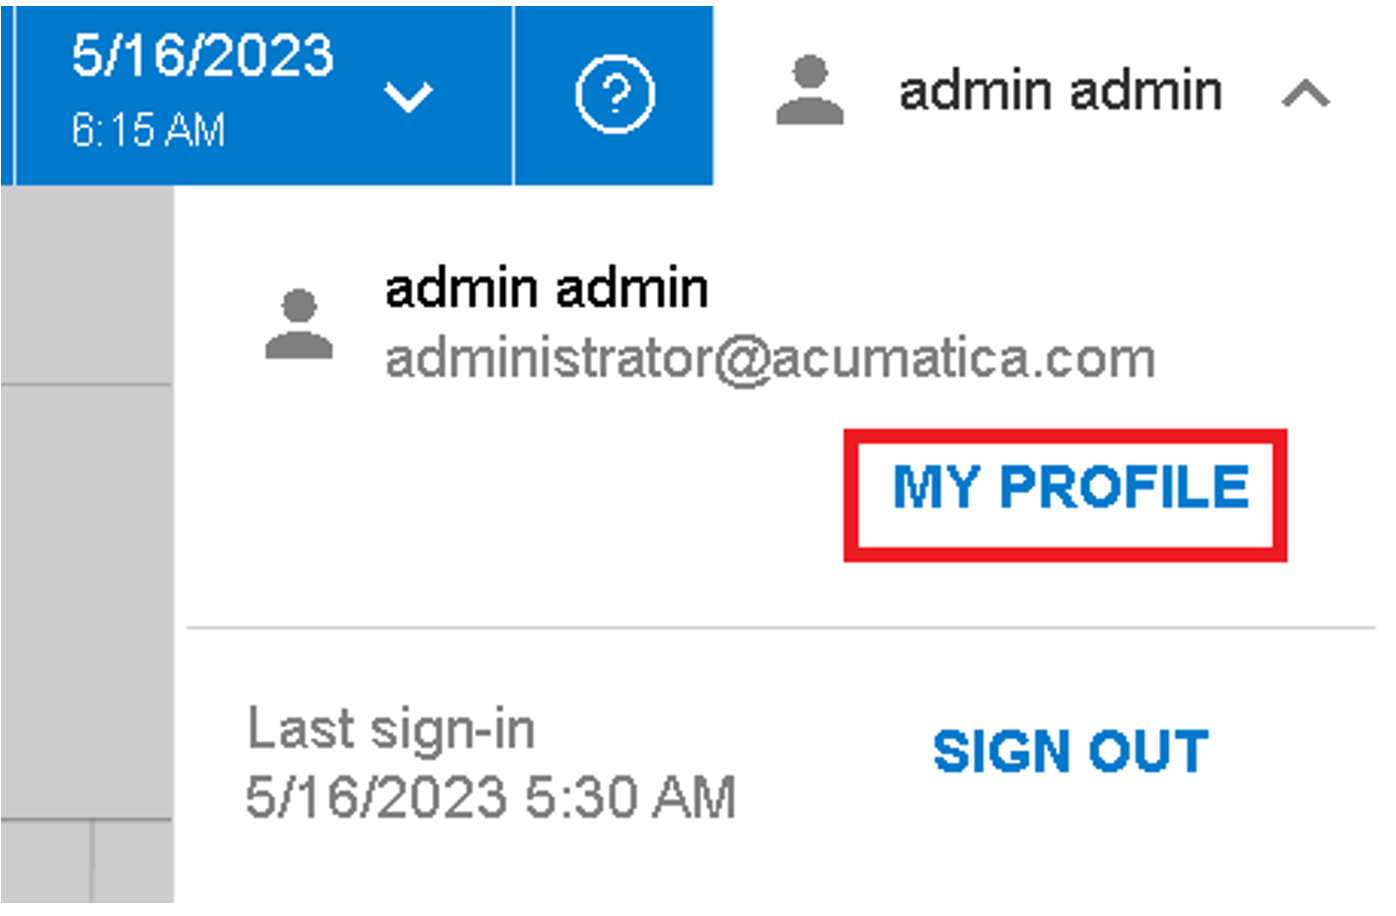
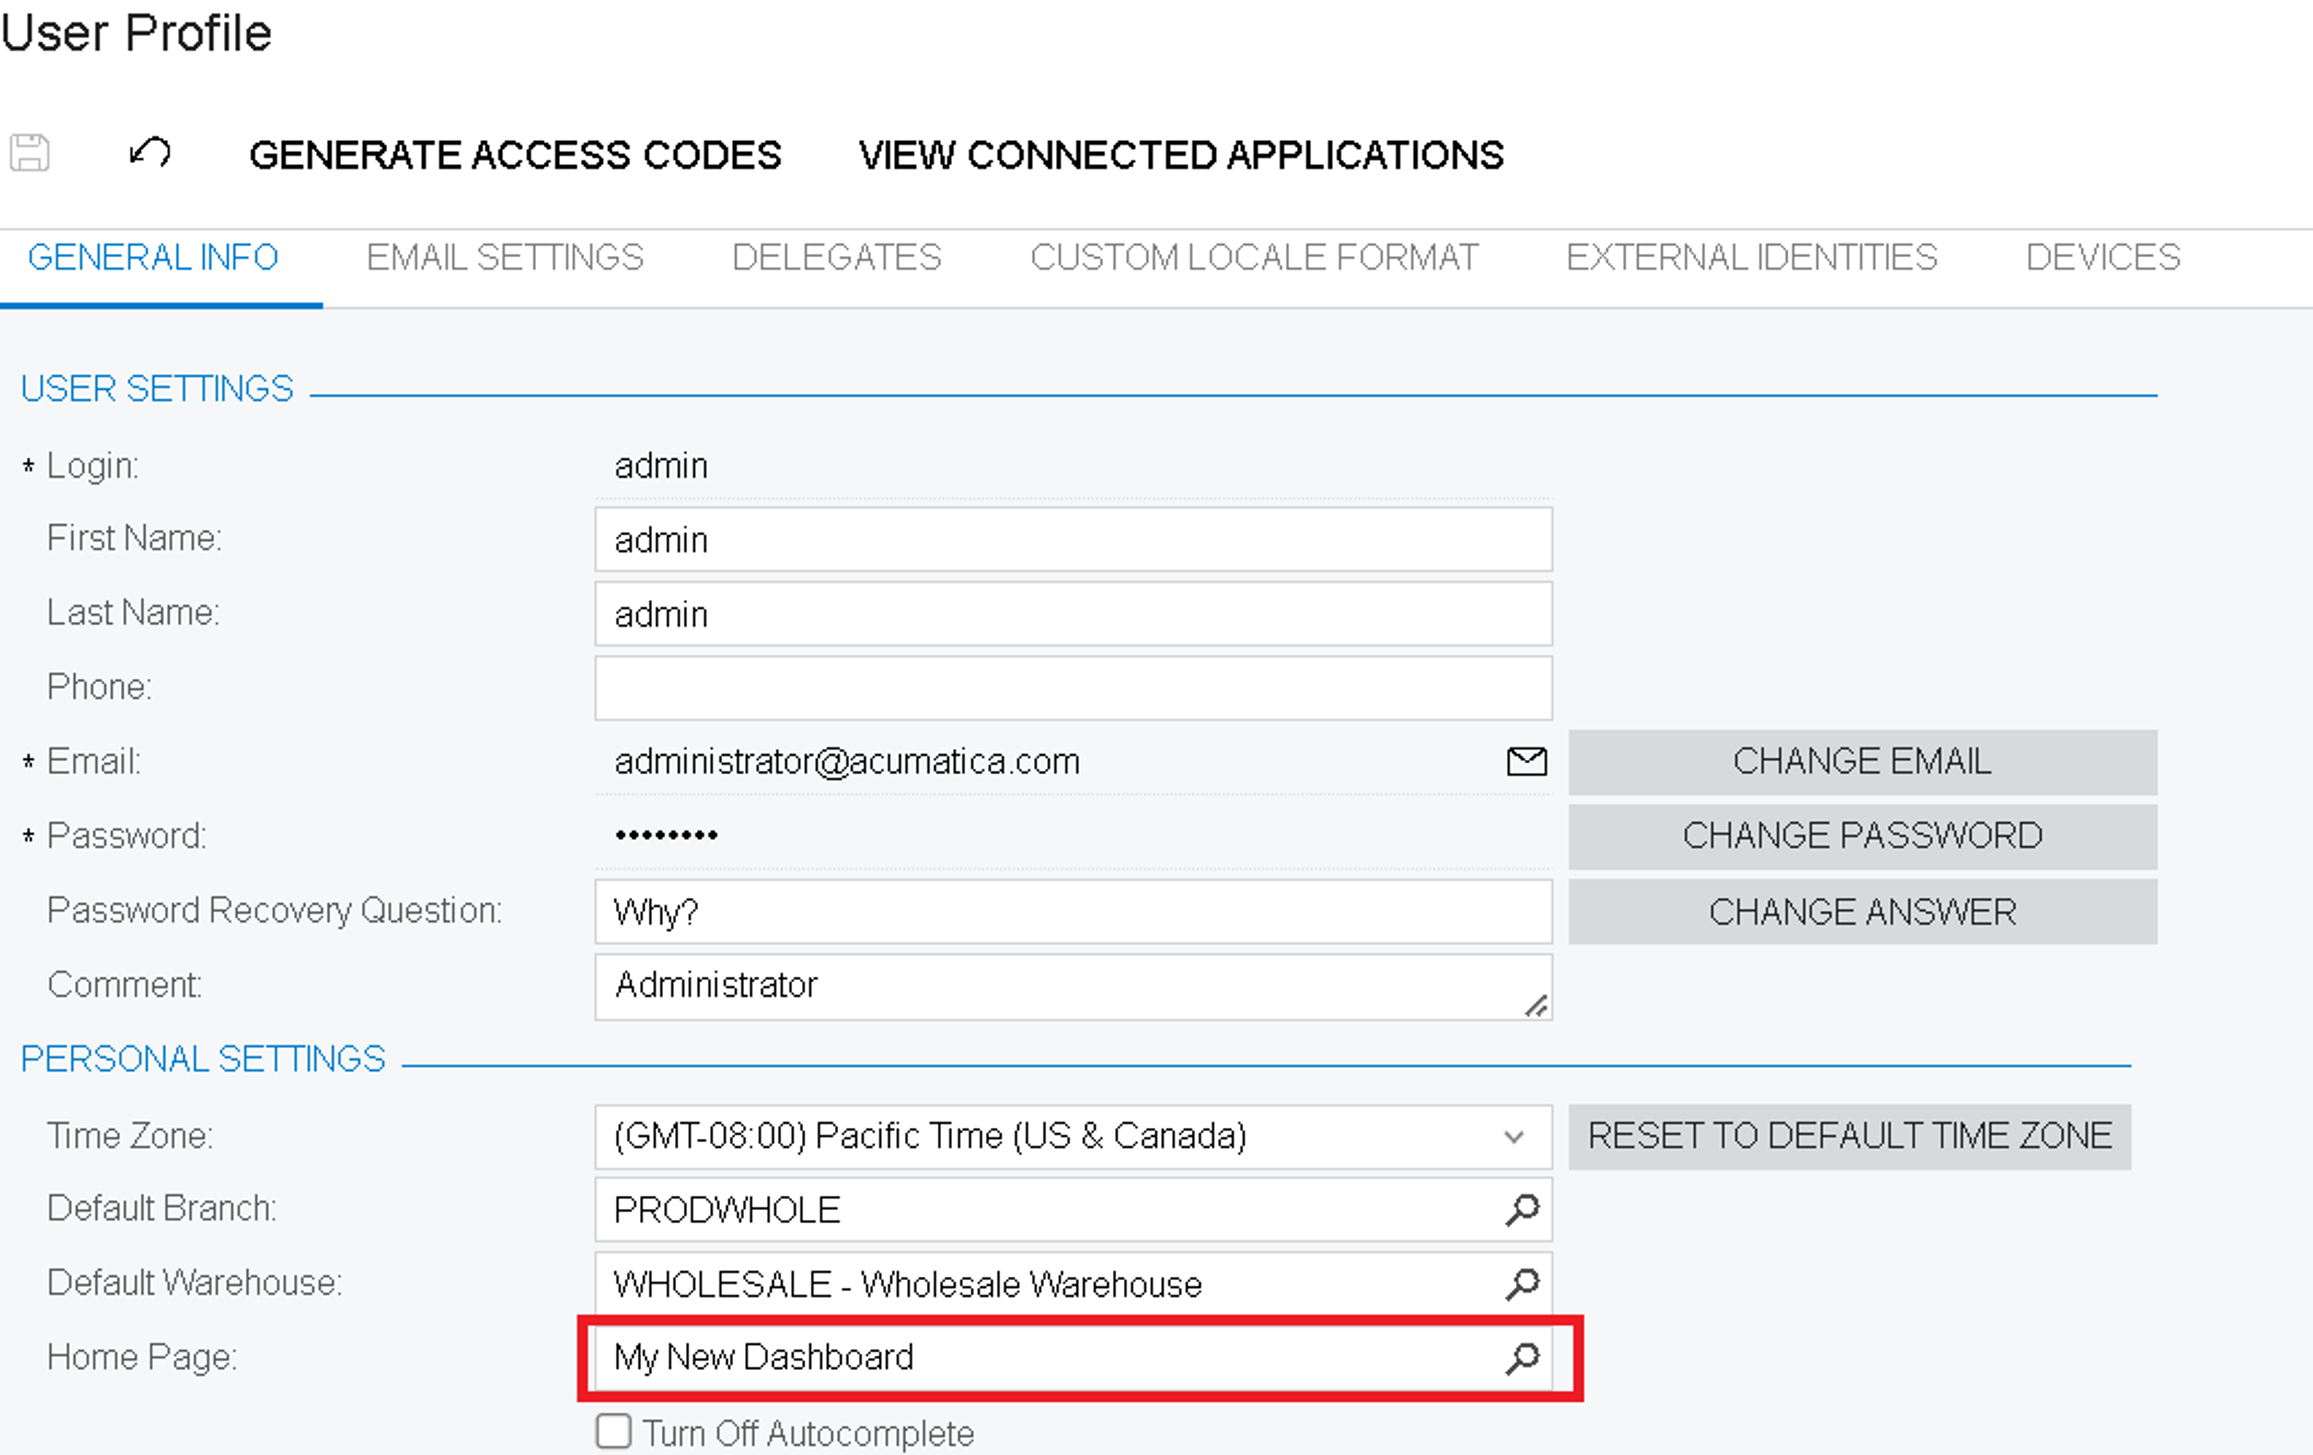
Next, let's make it the home page when you log in: сlick on your profile name in the upper right part à MY PROFILE. Then General Info tab in Personal Setting in Home Page box choose magnifier icon and select your screen and press Select. Don’t forget to Save. Check it by pressing home icon.

Now we have an empty dashboard. To create a widget on it, we need to click the DESIGN button on the upper right part of screen. As soon as we click on the design, the placeholder widget will immediately appear. This is what it looks like
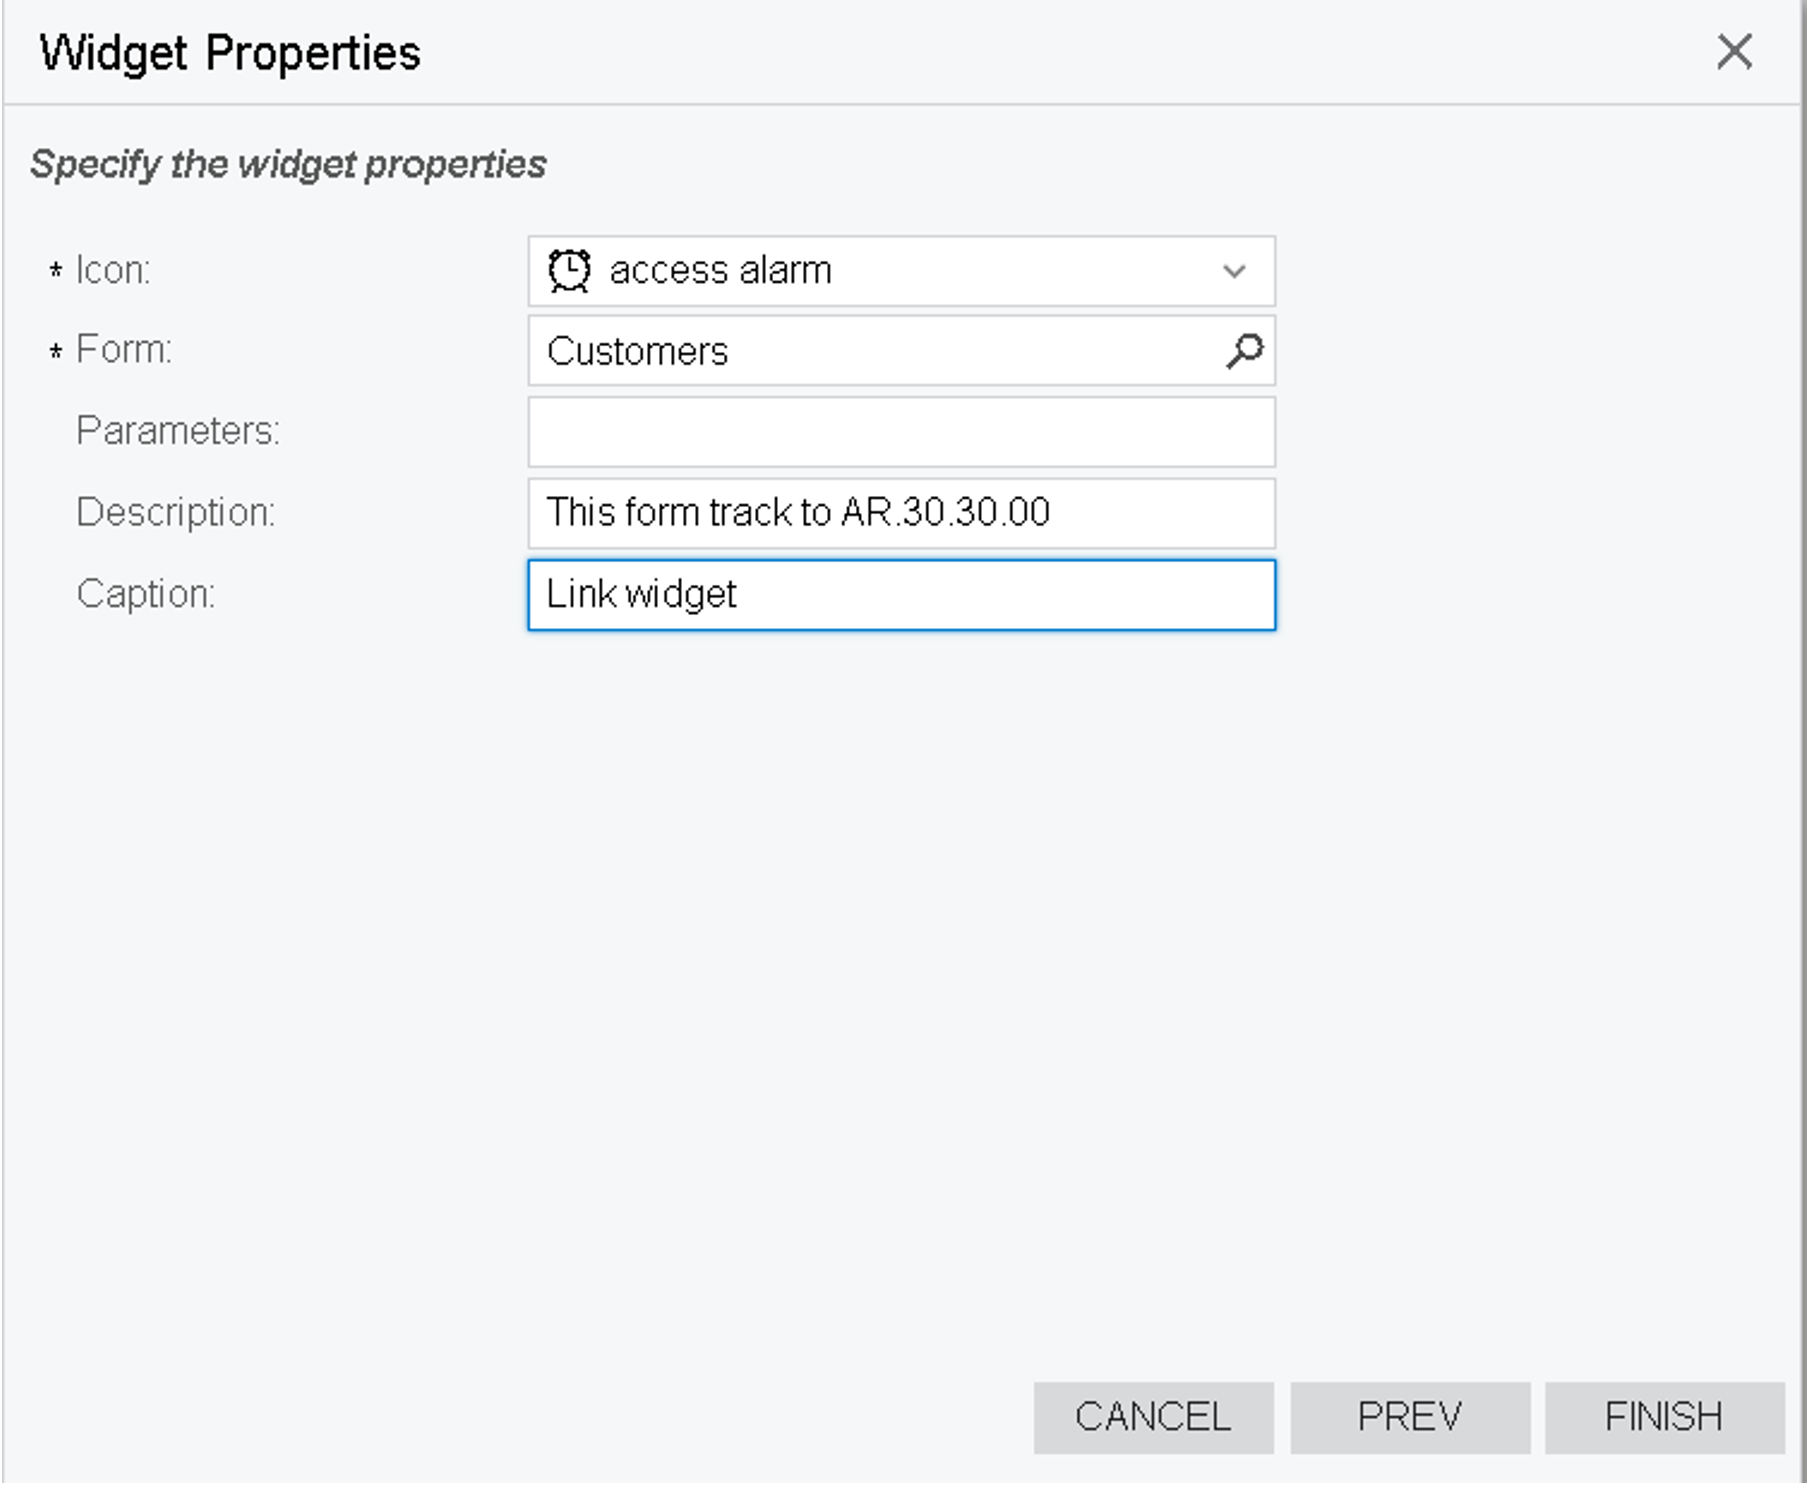
Click Add a new widget and select which one you want. Let's look at a few of them:
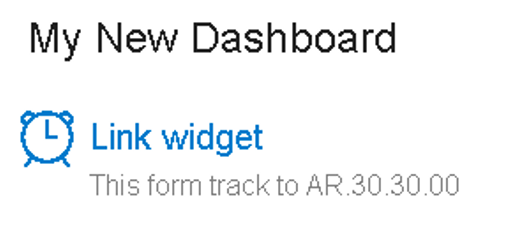
1.Link: choose Icon, Form to which it will be linked, Description and Caption à click Finish

Click Design and we have the following result: by clicking on this form takes us to the AR.30.30.00 form.
2.Embedded page: click add new widget à embedded page . Print in Source box à address of site and Caption and press Finish.

3.Table: add new widget à Data Table. Select: Inquiry Screen à screen from whom you want to receive data, then click Column Settings. The columns as displayed are in Selected Columns, you can add columns or remove them with the arrows. Refresh Data à how often data will update. Also you can limit your record by Record Limit box.
4.Header: it’s a simple tittle, need only to enter Caption box.
The result is as follows:
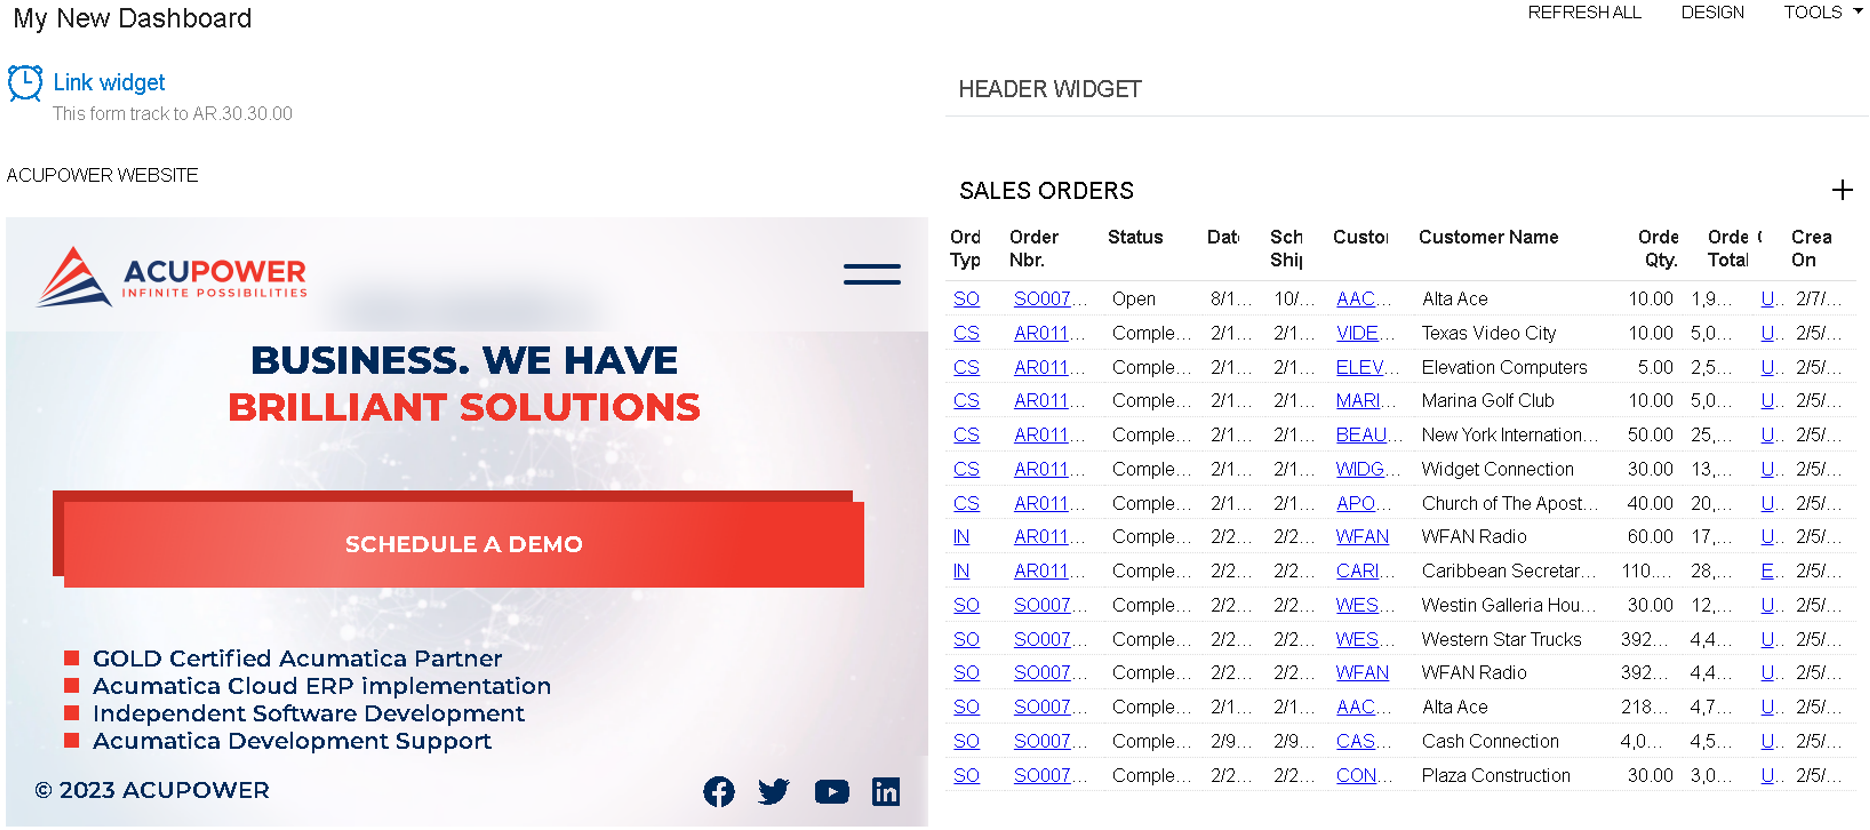
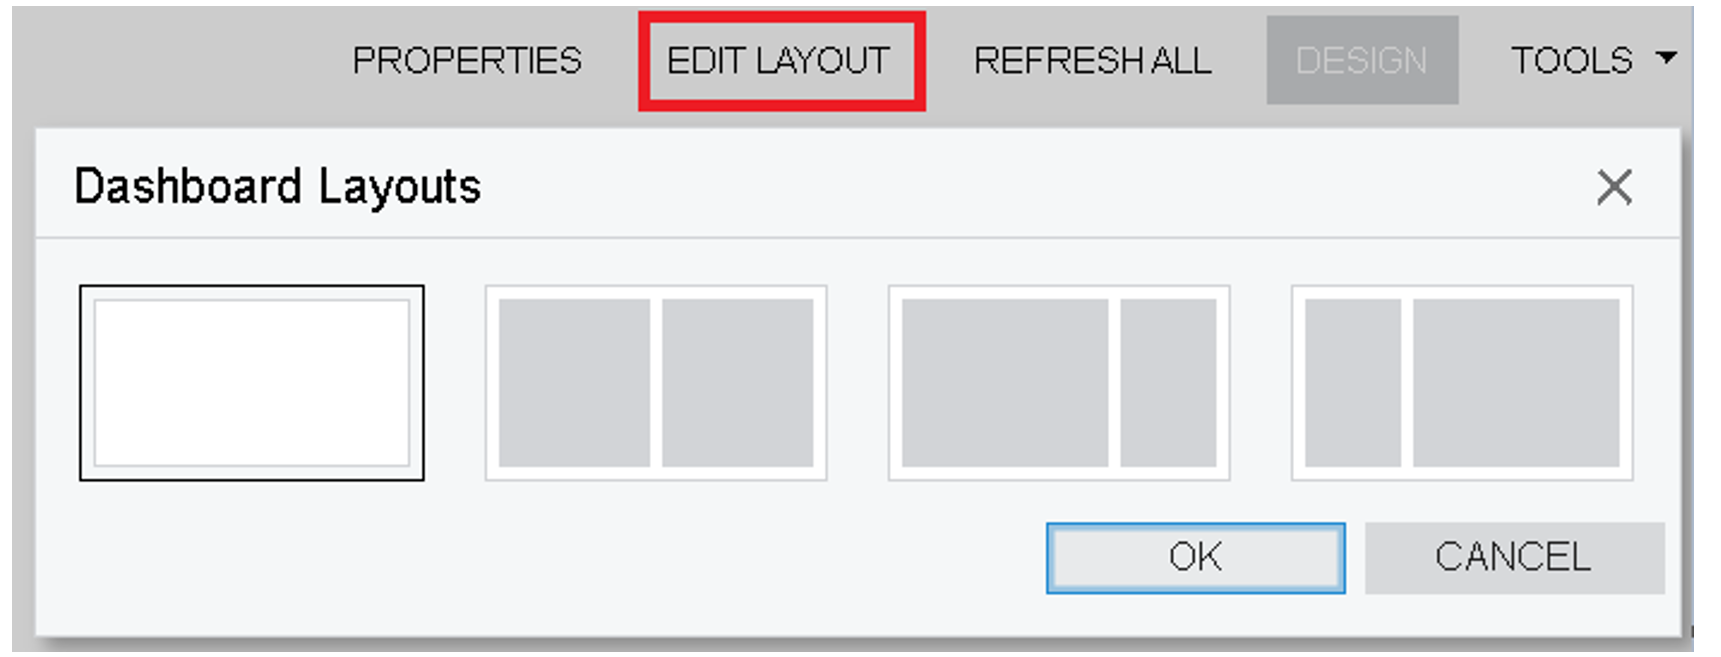
We can resize widgets by dragging the borders, edit by click on pencil, delete фnd change the location. Also you can click Edit Layout and change it, there are 4 available in total.
Summary
Acumatica's dashboard and widget features allow for a customizable and efficient way to access important information and perform tasks. The dashboard offers a variety of chart types and customization options, such as adding, removing, and resizing items, creating custom calculations and filters, selecting color schemes and layouts, and sharing and scheduling the dashboard. Acumatica provides a three-day webinar training program to teach users how to design dashboard contents, configure widgets, filter widget data, and manage access rights. Users can integrate Popdock into an Acumatica dashboard with just a URL using a Popdock Widget. The dashboard design process involves selecting widgets and using the drag and drop interface to customize them. Users can add widgets such as links, embedded pages, tables, and headers.
Ready to take your Acumatica experience to the next level? If you need a personalized dashboard or specific widget customization, we're here to help! Whether you're looking to streamline your workflows or enhance your user interface, our team of experts can craft a tailored solution for your business needs. Leave a request for your custom Acumatica development today and let us help you optimize your system with the perfect dashboard and widgets!